- Empty cart.
- Continue Shopping
How to Automate a Bathroom Fan with Humidity Control
- Posted on
 Strong Digital
- 0
- Categories: Uncategorized
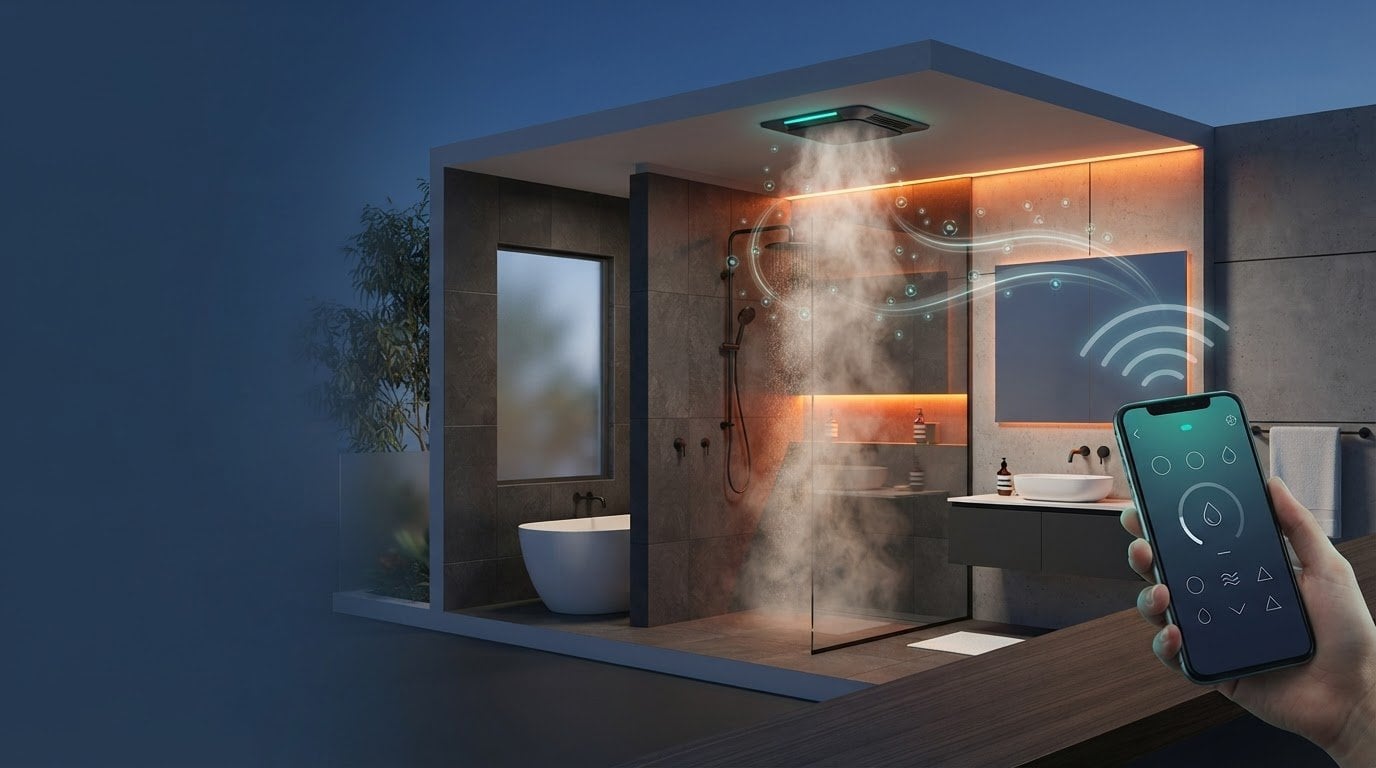
A fan that switches off with the bathroom light can stop before the moisture has cleared. To automate a bathroom fan, set a humidity trigger, such as switching it on at 70%, then keep it running for another 10 to 15 minutes after humidity drops towards normal. The right control depends on your existing fan and how you want it to respond.
Automating a bathroom fan can help clear steam after a shower and prevent the fan being left on longer than needed. This guide explains when humidity sensing is useful, how integrated controls compare with separate sensors and smart controls, and what to assess before choosing a setup. You’ll also learn how to create a clear on-and-off rule and test that it works as intended. In Australia, a licensed electrician should assess and install changes to fixed wiring or bathroom fan switching.
Key Takeaways
- Choose an integrated humidity-control fan for a replacement or upgrade, or consider separate sensors and controls for more automation options.
- Use clear on and off thresholds to stop humidity fluctuations from repeatedly switching the fan.
- Compare bathroom humidity with the adjoining room’s reading to help distinguish shower moisture from generally humid conditions.
- Plan a run-on period so the fan can clear lingering moisture after the trigger ends.
- Have changes to fixed wiring or bathroom fan switching assessed and installed by a licensed electrician in Australia.
Choosing a control approach for an existing fan
First decide what should trigger the fan: moisture, someone entering the room, or both. Then choose a sensor, switching method and household controls that suit that goal.
-
Compare humidity-triggered and manual control
Choose humidity-triggered control if you want the fan to respond to shower moisture without relying on someone to remember the switch. A manual wall switch gives direct control, but someone must turn the fan on and off. Compare both options with your bathroom routine: a busy household may benefit from automatic response, while occasional use may suit manual operation. A light switch alone does not detect humidity.
-
Identify the sensor, controller and fan roles
Before choosing components, identify the three roles in the setup. The humidity sensor measures moisture, the controller applies the rule, and the existing fan moves damp air outside. Check that the controller can receive the sensor’s reading and switch the fan through a suitable control arrangement. Plan for a control arrangement that connects humidity sensing with fan switching; the right setup depends on the components and installation.
- Decide whether voice control is part of the plan. Matter and Apple Home may be relevant if you want voice commands through a compatible household setup. Treat voice control and humidity automation as separate functions: a spoken command can request a switch, while automatic humidity response needs a sensor and a rule. Map how each component communicates before choosing. Matter or Apple Home support does not mean humidity sensing is included.
- Keep a practical manual option. Decide how someone can switch the fan when automatic control isn’t the right response. A wall switch offers a familiar way to operate it, while an automation rule can manage routine moisture control. Consider what happens if a sensor reading doesn’t reflect the bathroom’s conditions. For instance, a manual switch remains useful when the fan needs to run outside its usual humidity-triggered routine.
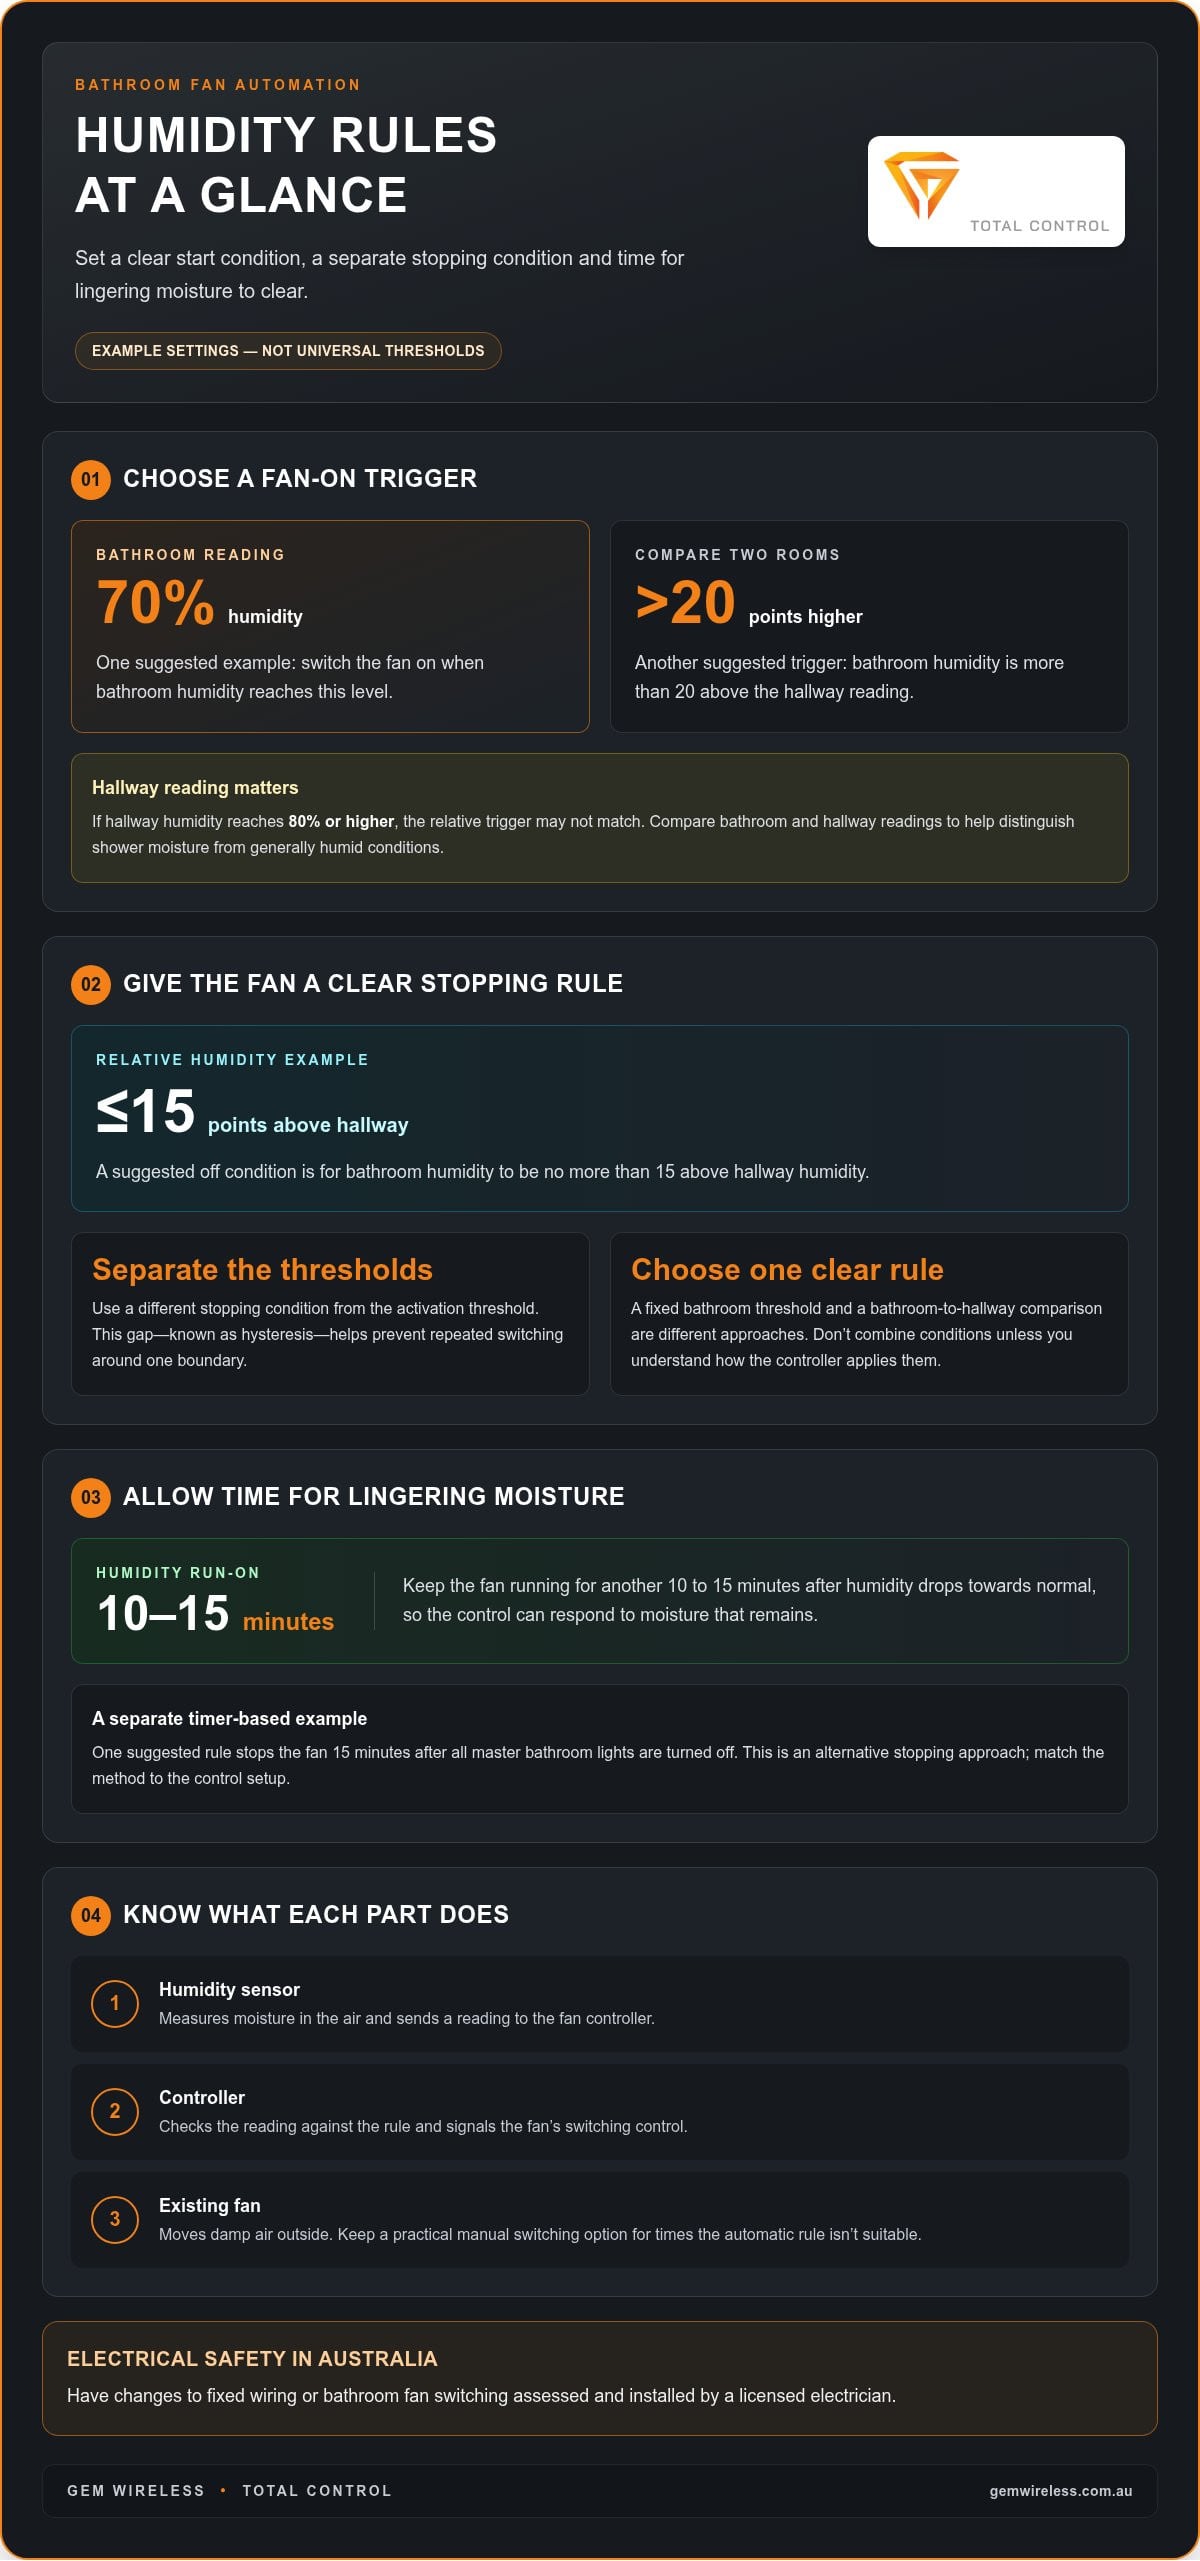
- Compare the bathroom with the adjoining room. A humidity reading in the hallway can help distinguish shower moisture from generally humid conditions, because replacement air may come from that room. One suggested rule triggers when bathroom humidity is more than 20 above hallway humidity. If hallway humidity reaches 80% or higher, that comparison could prevent the trigger from matching. You can also use humidity state changes rather than checking every 5 minutes.
- Choose a stopping rule as well as a starting rule. A trigger that switches the fan on needs a clear condition for switching it off. Compare bathroom and hallway readings, or use a run-on timer to avoid leaving the fan operating for a very long time. One example is a requested rule to stop the fan 15 minutes after all master bathroom lights are turned off. Match the method to the control setup you’ve chosen.
Why automate a bathroom exhaust fan with a humidity sensor?
Set a moisture trigger and a separate stopping condition for the fan. The thresholds below are examples for creating a rule, not universal settings.
-
Understand how sensors detect bathroom moisture
Choose a humidity sensor that can send readings to the fan controller. It detects moisture in the surrounding air and provides a reading for the automation. Place it where it can sense bathroom conditions, rather than relying only on a reading from another room. A shower raises bathroom humidity, while an adjoining room’s reading can help show whether the whole home is already humid.
Use the sensor reading as an input, not as a direct fan switch. The controller compares the reading with your rule, then signals the fan’s switching control. For example, the rule can respond when bathroom humidity rises above a chosen level. If the response depends on bathroom humidity compared with hallway humidity, include readings from both areas rather than relying on a single reading.
-
Calibrate humidity thresholds for fan activation
Choose an activation condition that reflects moisture from bathing. One suggested example switches the fan on when bathroom humidity reaches 70%. Treat this as a starting point for a control rule, not a fixed setting for every bathroom. A second approach triggers when bathroom humidity is more than 20 above hallway humidity, accounting for the adjoining room’s reading.
Decide which comparison best fits your sensor arrangement. A fixed 70% threshold uses the bathroom reading alone; a relative trigger compares two rooms. Check that the rule identifies the bathroom as the measured space and the hallway as the comparison space. If hallway humidity is 80% or higher, the relative trigger may not match. Don’t combine conditions unless you understand how the controller applies them.
-
Set hysteresis and humidity-based run-on time
Separate the activation threshold from the stopping threshold to create hysteresis. This gap helps prevent repeated switching when a reading moves around one boundary. For example, a rule may start the fan at 70%, then use a lower humidity condition to decide when it can stop. A different suggested rule waits until bathroom humidity is no more than 15 above hallway humidity.
Add a run-on condition so the fan doesn’t stop as soon as humidity begins falling. One example keeps it running for another 10 to 15 minutes after humidity drops towards normal. That delay gives the rule time to respond to lingering moisture. Keep the activation, stopping and run-on conditions clear, so the controller doesn’t receive conflicting instructions.
-
Allow the fan to shut off as humidity drops
Set a distinct off condition and decide how long it must remain true. One suggested setup turns the fan off after humidity stays below 50% for five minutes. Another humidity-based rule waits 0:05:00 before switching off, once bathroom humidity is no more than 15 above hallway humidity. These are alternative examples, not conditions to combine automatically.
After a shower, watch the bathroom reading fall to test the off rule. Confirm that the fan stays on while the stopping condition remains unmet, then turns off when the required humidity and delay conditions are satisfied. If it stops too soon, review the threshold and run-on setting. This gives your bathroom fan a clear response to both rising and falling humidity.
Integrated humidity-control fans versus separate smart components
In Australia, the cost of automating a bathroom fan depends on whether you replace the fan or add controls to an existing one. Equipment choices and any required installation work are the main factors.
-
Compare integrated fans with separate smart components
Choose a fan with integrated humidity control if you’re already planning a replacement or upgrade. The humidity control is built into the fan, which may work without a separate smart-home ecosystem. Check how the new fan suits the existing installation before deciding.
For an existing fan, consider a separate humidity sensor and smart controls. This approach gives you more choice in sensors, control methods and automation settings. It may also depend on a compatible hub, network or smart-home platform. Check component compatibility before choosing separate devices.
-
Identify the components for fan automation
List the parts your setup needs: a humidity sensor, a controller and an exhaust fan. The sensor provides humidity readings, the controller applies the automation rule, and the fan moves damp air out. In an integrated unit, humidity control is built into the fan. With separate components, each has a distinct role.
Map the signal path from sensor to fan. For example, a sensor sends a reading to a controller, which then switches the fan on or off. Make sure your design includes a way to switch the existing fan. A sensor measures moisture but cannot complete the control chain by itself.
-
Consider smart hub and fan-switch components
Choose separate smart components if you need more control over sensors or automation settings. Check that the sensor and fan switch communicate through the same compatible hub, network or smart-home platform. A hub connects devices within a smart-home setup, while the switching component controls fan power. Plan the humidity trigger and switching function as distinct parts of the system.
Before settling on a setup, note which component handles each task. For example, a humidity sensor reports a change, a controller applies the rule, and a fan switch responds. Voice control or a smart-home connection is not a substitute for a humidity sensor. Each feature has a different role.
-
Review the cost of automating an exhaust fan
Compare the two project options before budgeting: replace the fan with an integrated humidity-control model, or keep the existing fan and add separate components. The total depends on the equipment needed, whether a compatible hub is required, and the work involved in the existing installation. These factors define the project’s scope.
Make a parts list for your preferred option, including the fan, sensor, controller and any hub or network requirements. Then account for installation needs, especially if the project changes fixed wiring or fan switching. Comparing the options helps you decide whether upgrading the existing fan or replacing it better suits your bathroom and automation goals.
Electrical assessment and safe installation
Before adding a timer or smart control, have the existing fan and switching assessed. In Australia, a licensed electrician must handle changes to fixed wiring and bathroom fan switching.
-
Assess the electrical setup before installation
Ask a licensed electrician to assess the fan, its existing switch and the proposed control. The setup must suit the fan and the way its power is switched. A typical bathroom fan draws around 50 watts, but that figure alone does not determine whether a particular control is suitable.
Explain whether you want a timer, humidity response or both. Describe how the fan operates now, including whether it starts with the bathroom light. A licensed electrician can assess the fixed wiring and control arrangement before work begins. Do not open switches or handle wiring yourself: bathroom fan circuits involve mains electricity.
- Keep the assessment specific to the installation. Existing wiring, the fan’s switching arrangement and the chosen control all affect the work. For example, replacing a wall switch with a timer may involve different wiring considerations from adding a control elsewhere. Give the electrician the fan details and describe your intended operation, including whether manual switching must remain available.
-
Install a bathroom fan timer switch
Use a licensed electrician to install a bathroom fan timer switch in Australia. Work involving 240V wiring must be handled by a licensed electrician, and changes to fixed wiring or fan switching should be assessed and installed by one. Regulatory guidelines state that installing a bathroom fan timer switch as electrical wiring work requires an electrical licence or certificate, regardless of the work’s cost.
Describe the result you want, such as a timed run after the light is switched off. The electrician can assess the switch, wiring and fan together, then install a suitable arrangement. Do not attempt the wiring yourself or treat a timer switch as a plug-in accessory.
- Agree on the intended operation before work starts. Decide whether the fan should respond to a timer, humidity control or a manual switch. For example, explain whether it should keep running after the bathroom light turns off. A clear plan helps the electrician assess the right control and avoid an arrangement that does not suit your routine.
- Keep installation and configuration separate. A licensed electrician must handle fixed-wiring work; configure automation settings after the control is installed. Once the electrician has completed the work, use the system controls to set the intended timer or humidity behaviour. Record how manual operation works so household members can use the fan as intended.
Setting up and testing an automation rule
Create the rule by choosing a trigger, a fan action and a clear stopping condition. Test each part separately, then check the full sequence during normal bathroom use.
-
Set up the automation rule
Select the bathroom humidity sensor as the trigger, then choose the fan as the device to switch. Add a distinct stopping condition, such as humidity returning towards normal or a timer ending. Keep the trigger and off condition clear to prevent conflicting instructions.
Next, choose whether the bathroom light should affect the rule. One example switches the fan off about 10 minutes after the light turns off or times out. Treat this as a separate rule from humidity control. If both rules operate, define how each one should influence the fan.
- Check the rule’s device names and actions. Confirm that the selected sensor measures bathroom humidity and the selected switch controls the exhaust fan. A mislabelled device can make a correct rule appear faulty. Read the actions in order: the sensor condition is met, the controller responds, and the fan changes state.
- Save the rule and review its conditions. Check the trigger, fan action, stopping condition and any timer before activating it. For example, the humidity trigger should switch the fan on, while the off condition should allow it to stop. Make sure the fan action has a clear route back to off.
-
Test and troubleshoot fan operation
Test the automation by creating the condition that should start the fan, then observe the sensor and switch response. After the trigger clears, check whether the off condition or timer ends operation. A setup that turns off about 10 minutes after the light goes off should follow that sequence when the light turns off or times out.
If the fan doesn’t start, check that the rule selects the correct sensor and fan switch. If it doesn’t turn off, inspect the stopping condition and timer. For humidity rules, compare the live reading with the configured threshold. Change one setting at a time, then repeat the same test.
- Separate automation faults from electrical faults. Use the control interface to check whether the rule ran and whether the fan switch changed state. Don’t open a switch or alter fixed wiring while troubleshooting. If the rule sends the correct action but the fan doesn’t respond, stop testing and have a licensed electrician assess the electrical setup.
- Record the working sequence. Note the trigger, fan response and shut-off condition that passed your test. This gives household members a clear reference if the bathroom routine changes. If you’re planning wireless switching alongside the automation, explore wireless control options for your setup.
Gem Wireless: Switch Module Kits
Gem Wireless offers Switch Module Kits for wireless control of switching systems, including projects that modernise how an existing fan is switched. The switching solutions work with existing switches and lights and require no rewiring. They can complement a control plan where suitable separate components handle the humidity sensor and automation logic.
Consider a Switch Module Kit, Mains Powered Switch, Long Range Switch or Switching Module when you need wireless switching for your project. Choose an option that suits your planned control arrangement, and leave fixed-wiring work to a licensed electrician.
Visit Gem Wireless to explore its wireless switching options, or contact Gem Wireless to discuss your project.
Make your next step a practical one
Before choosing equipment, consider how you want the bathroom to work day to day. Should the fan respond to moisture, remain easy to control manually, or fit into a broader switching plan? A short outline helps you focus on the outcome instead of adding features you don’t need. Then match that outcome to a suitable control arrangement for automating the fan.
Gem Wireless offers Switch Module Kits, Mains Powered Switches and Long Range Switches for wireless switching systems. Consider these options when planning how to control existing switches and lights within a broader setup. Keep the humidity sensor and fan-control requirements clear when deciding what role wireless switching should play.
Contact Gem Wireless about fan automation to discuss a suitable switching option for your project. With a clear plan and the right controls, you can move towards a bathroom setup that fits your routine.
Frequently Asked Questions
When can automatic fan control be useful?
Automatic control is useful when someone often forgets to turn the fan on after a shower or switches it off with the bathroom light. For example, a humidity trigger lets the fan respond to moisture rather than relying on someone to remember. It can also help when visitors may not know the usual fan routine. Keep a manual switching option for times when you want direct control.
What are the main ways to automate a bathroom exhaust fan?
The main options are an integrated humidity-control fan, a separate humidity sensor and controller, or a timer or occupancy-based rule using a smart switch. Match the control to the condition you want to detect. An integrated fan combines sensing and operation, while separate components give you more choice. A timer responds to elapsed time; a motion sensor responds to movement.
How do humidity-sensing bathroom fans work, and what settings should I use?
A humidity-sensing fan measures moisture in the air and switches on when its trigger condition is met. Some controls use a rise above a set humidity level; others compare the bathroom reading with an adjoining room. A suggested example activates at 70%, then turns off after humidity stays below 50% for five minutes. Treat those settings as a starting example, then assess how the fan responds during ordinary shower use.
Can a bathroom fan be automated with a motion sensor or smart switch?
Yes, if the control components suit the fan and the intended switching arrangement. A motion sensor can trigger a rule when someone enters, but movement doesn’t confirm that the room is humid. A smart switch can operate the fan, while a humidity sensor provides the moisture-based trigger. For example, combine occupancy with a timer, or use humidity as the main trigger and retain manual switching.
What are the Australian electrical safety rules for installing bathroom fan controls?
In Australia, work involving 240V wiring must be handled by a licensed electrician. Changes to fixed wiring or bathroom fan switching should also be assessed and installed by a licensed electrician. This applies when adding a timer switch or changing how a fan receives power. Keep configuration of automation rules separate from electrical work, and don’t open a switch or handle fixed wiring yourself.
What are the wiring requirements and bathroom zone restrictions for fan switches in Australia?
Wiring and switch placement depend on the existing circuit, the fan connection and the control’s location relative to bathroom fixtures. Bathroom zones affect which electrical equipment can be installed in particular areas, so the assessment must consider the proposed switch position and equipment suitability. Don’t relocate or wire a control based on a general diagram alone. A licensed electrician should assess fixed wiring and bathroom fan switching for your installation.
Humidity sensor vs timer vs motion sensor: which bathroom fan control is best?
Choose a humidity sensor if you want the fan to respond to damp air, a timer for a defined run-on, and a motion sensor if occupancy should start operation. Each detects a different condition, so the right fit depends on your bathroom routine. For example, humidity control can respond after a shower even if nobody remains in the room, while motion alone may not detect lingering moisture.
How do I set a bathroom fan run-on timer and humidity threshold?
To automate a bathroom fan, set a clear activation condition, then choose a separate off condition and run-on delay. One suggested setup starts the fan at 70% humidity and switches it off after humidity stays below 50% for five minutes. Another example keeps it running for 10 to 15 minutes after humidity drops towards normal. Test the sequence during shower use and adjust the conditions if the fan starts or stops at the wrong time.
bathroom fan automationbathroom ventilationelectrical upgradesexhaust fanhome automationhumidity sensormould preventionsmart home