- Empty cart.
- Continue Shopping
How to Control Landscape Lighting With Smart Controls
- Posted on
 Strong Digital
- 0
- Categories: Uncategorized
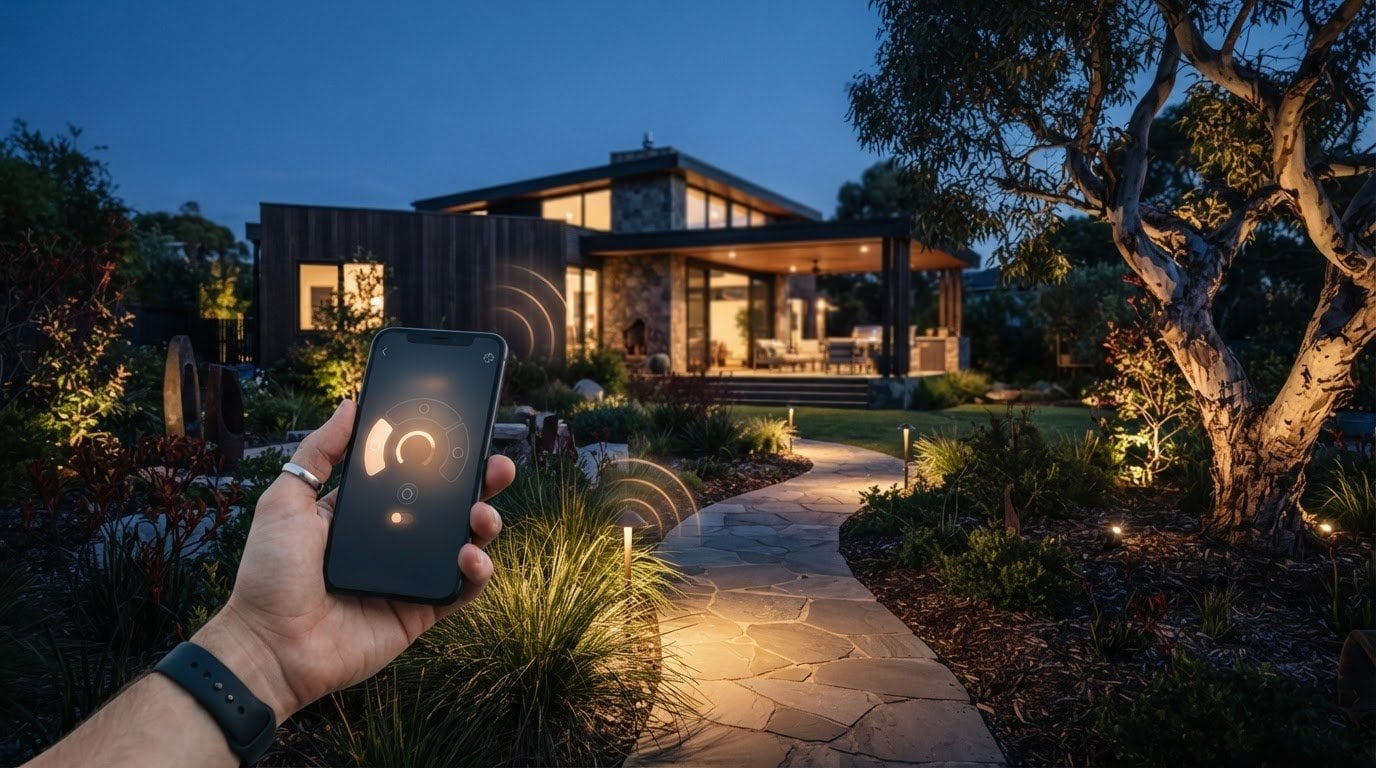
Smart landscape lighting doesn’t need a complete rebuild. To learn how to control landscape lighting, connect compatible smart controls to the existing lights or switches, then use an app or programmed schedule to manage when the lights turn on and off. Where the equipment supports it, you can also adjust brightness and colour.
You can add control without taking on daily tasks or replacing a working setup. Schedules can follow a set time or sunrise and sunset, while motion sensors can switch lights on when they detect movement. You can also group lights into zones so paths, garden features and entertaining areas operate independently.
This guide explains how controls and schedules work, what to consider when connecting controls to existing landscape lights, and how to manage brightness and colour where supported. It also covers wireless switching modules, which can control compatible lights and switches without rewiring.
Key Takeaways
- Use sunset and sunrise tracking, time-based schedules or motion activation to make outdoor lighting fit your routine.
- Set brightness and colour to suit the space, from warm garden accents to a cooler, brighter effect.
- Check how your existing lights and switches are controlled before choosing smart controls; compatible wireless modules can help avoid rewiring.
- Group lights into zones or scenes so paths, gardens and entertaining areas can be controlled separately or together.
- Plan the setup around the controls you want, the layout of your lights and whether you need app access, schedules or simpler switching.
Scheduling, timers and activation notifications
Schedules, timers and sensors determine when garden lights switch on and off. Sunset tracking, motion sensing and time-based settings help tailor lighting to how you use each space.
Timers and programmable controllers
A timer switches lights on or off at set times, while a controller can manage schedules and separate lighting zones. For example, path lights may need a different routine from garden feature lights. Set each schedule around how you use the area, then adjust it if seasonal daylight makes the lights turn on too early or too late.
In Australia, the total cost depends on the controller, its compatibility with your existing lights and the work involved. A timer-only change differs from adding sensor control or altering the switching arrangement, so consider equipment and labour together.
Sensors, remotes and automatic timing
Sensors switch lights on when they detect movement; remotes provide manual control. To set a timer, choose the lights or zone, set the on and off times, then select the days it should run. For example, schedule pathway lights for the evening and use a sensor for movement near an entry.
Use sunset and sunrise tracking when you want lights to follow daylight rather than a fixed clock time. Fixed schedules suit predictable routines, while motion sensing can limit lighting to times when someone is nearby. Set each zone according to its purpose.
If lights switch on or off at the wrong time, check the controller’s clock, selected days and on/off settings first. For a sunset or sunrise schedule, review the location and daylight-tracking setting. For sensor activation, check that the sensor faces the intended approach and is not triggered by a moving branch or passing traffic. Then test the control manually.
Some systems let you control outdoor zones independently, so paths and garden features can follow separate schedules. If the app offers notifications, they can alert you when a scheduled or sensor-based event occurs. Remember that changing a notification setting won’t fix an incorrect schedule or sensor placement.
Outdoor lighting can use motion sensors, surveillance cameras or presence detection to trigger lights when movement is detected near a property. Choose the trigger according to the purpose: movement near the property, occupancy, daylight or a set time. Matching the control to each area’s needs is more useful than treating every exterior light the same way.
Outdoor lighting automation can use sunset and sunrise tracking, occupancy sensing and time-based schedules to limit lighting to when it is required. Australian homeowners can use dynamic schedules for exterior and landscape lights to make their homes appear occupied while they are away. For this use, shape the schedule around the intended pattern for each area, and consider it alongside sensor-triggered activation so the different controls serve distinct purposes.
Colour, dimming and saturation controls
Colour-changing controls can shift a garden from subtle accent lighting to a brighter look for entertaining. The result depends on the light: dimming changes brightness, while colour and saturation settings change its tone and intensity.
Colour temperature and brightness
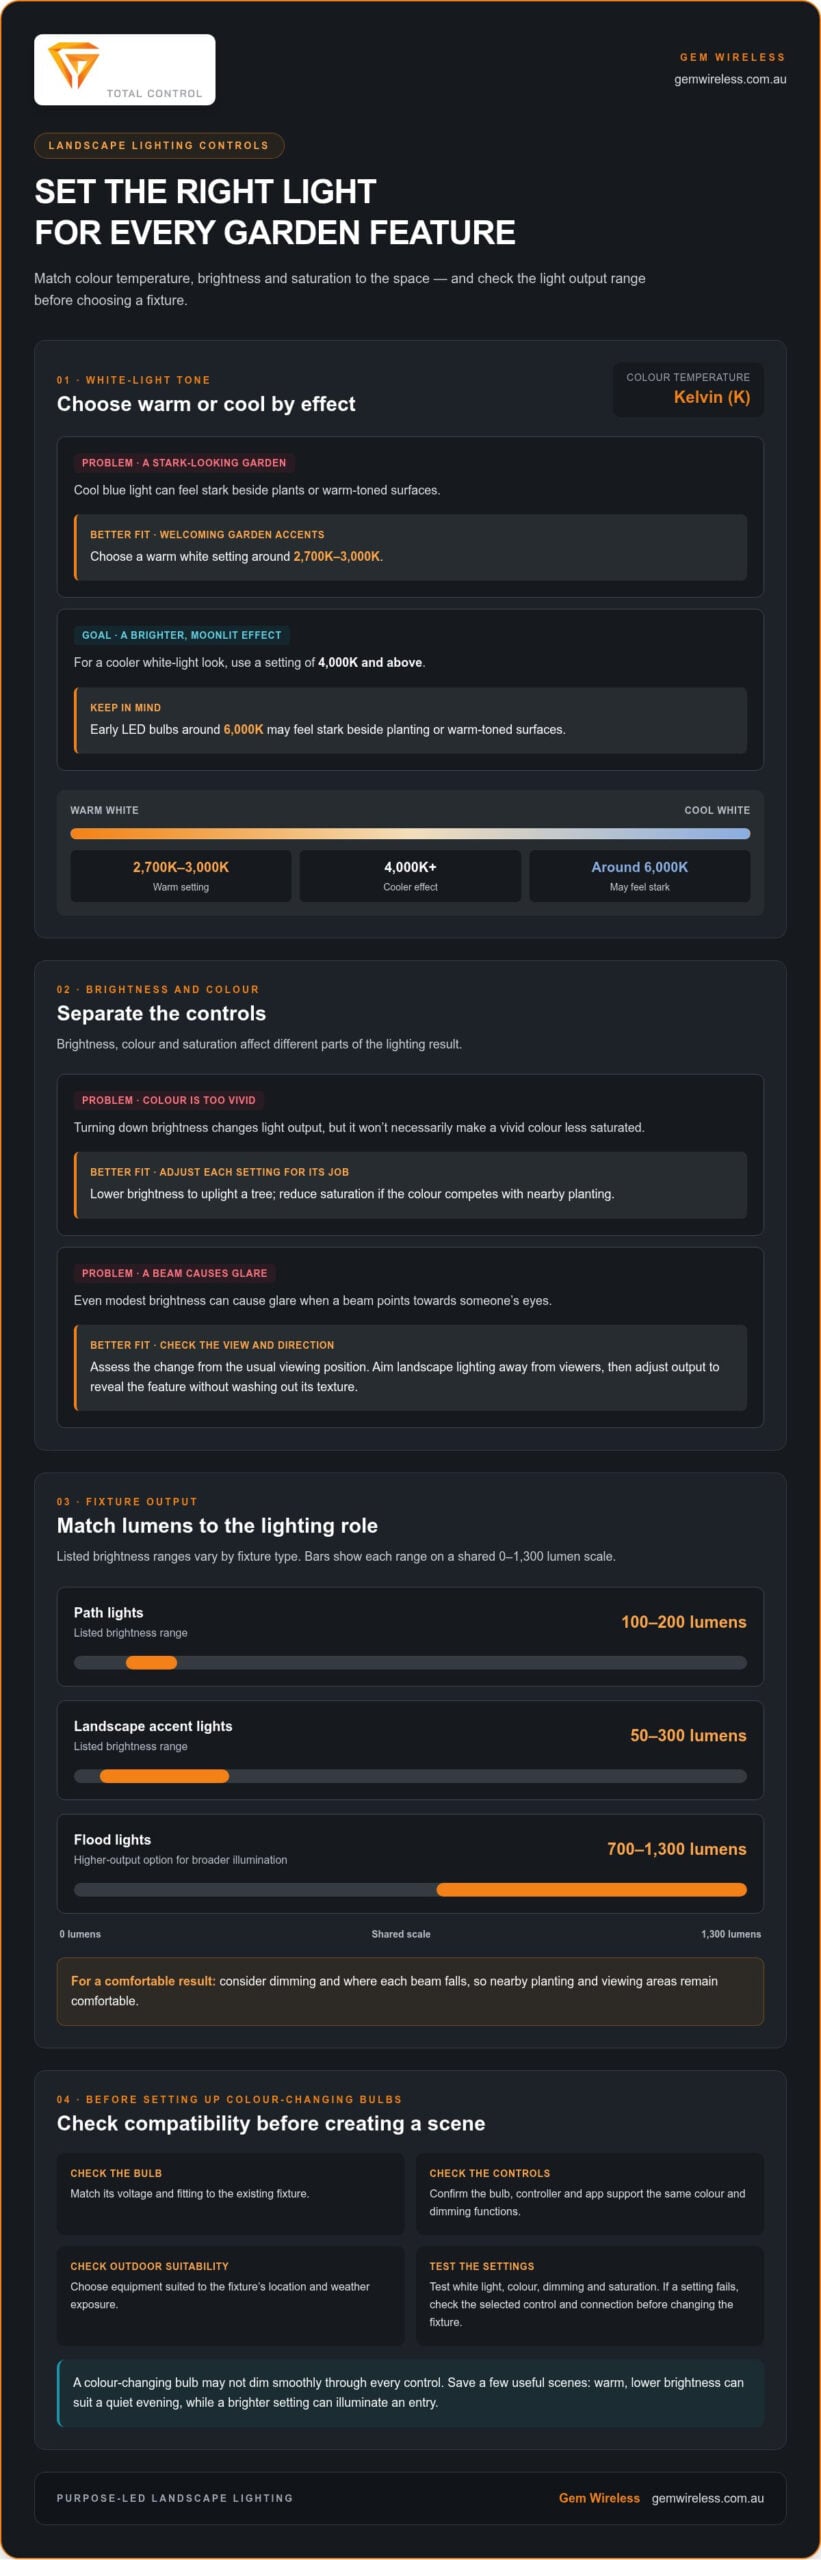
Colour temperature describes whether white light looks warm or cool. For a welcoming garden, choose a warm setting around 2,700K to 3 000K. Cooler settings of 4,000K and above create a brighter, moonlit effect. Some early LED bulbs produced a cool blue light around 6,000K, which may feel stark beside plants or warm-toned surfaces.
Brightness controls change light output, while saturation adjusts the intensity of coloured light. They are separate settings, so reducing brightness won’t necessarily make a vivid colour less saturated. For example, use lower brightness to uplight a tree, then reduce saturation if the colour competes with nearby planting.
Assess changes from the usual viewing position, not directly beside the fixture. A beam aimed towards someone’s eyes can cause glare, even at modest brightness. Direct landscape lighting away from viewers, then adjust the output to reveal the feature without washing out its texture.
Setting up colour-changing LED bulbs
Before installing a bulb, check its voltage and fitting against the existing fixture. Confirm that the bulb, controller and app support the same colour and dimming functions. A colour-changing bulb may not dim smoothly through every control, so check compatibility before building a scene around it.
For outdoor use, choose equipment suited to the fixture’s location and exposure to weather. Fit the bulb according to its instructions, connect it to a compatible control, then test white light, colour, dimming and saturation. If a setting fails, check the selected control and connection before changing the fixture.
Save a few useful scenes instead of adjusting every light repeatedly. A warm, lower-brightness setting can suit a quiet evening, while a brighter setting can illuminate an entry. Focus coloured accents on selected features to keep the garden balanced.
If your main goal is switching existing lights rather than changing their colour, wireless lighting controls can offer a separate control route.
Brightness ranges can help keep each fixture suited to its role. Path lights are listed with a brightness range of 100-200 lumens, while landscape accent lights are listed with a brightness range of 50-300 lumens. Flood lights are listed with a brightness range of 700-1300 lumens, making them a higher-output option when broader illumination is needed. Consider these ranges alongside dimming and where each beam falls, so nearby planting and viewing areas remain comfortable.
When comparing bulb types, halogen bulbs use 20 to 60 watts of power and are described as lasting two years. Keep these details in mind when choosing a fixture, then test the selected output at night and adjust the scene rather than relying on colour alone.
Smart lighting compatibility with existing fixtures
Smart controls can work with existing landscape fixtures when they match the lighting circuit and switching arrangement. Identify the transformer, fixture type and current switch first. Then decide whether you need simple on/off control or dimming and colour changes.
Low-voltage landscape lighting typically operates at 12 V through a transformer, which reduces mains supply voltage for the lighting circuit. Mains-voltage lighting connects to the mains supply, so its controls and installation requirements differ. Identify which system you have before selecting a smart control.
Fixture type affects compatibility and how the garden is lit. Path lights spread light across a walkway, while spotlights highlight a tree or wall. Wall washers illuminate broad surfaces, and well lights sit in the ground to light planting or architectural features from below. Check each fixture’s lamp and control requirements before adding smart switching.
Compatible wireless controls can operate existing switches and lights without rewiring. A controller may switch a whole circuit; separate zones need controls that match the wiring arrangement. For example, keeping entry path lights separate from garden uplighting lets each group serve a different purpose.
Aiming matters as much as switching. Direct each beam towards the feature, not the usual viewing position. To highlight a tree, aim the uplight into its canopy, then adjust its angle from the path or seating area. This reduces glare and keeps light on the intended surface instead of spilling into neighbouring spaces.
Depending on their design, fixtures can attach to stakes, brackets, wall plates or recessed housings. A stake suits soil beside a garden path; a bracket secures a spotlight to a wall. Consider the transformer and cable route before moving a fixture, as relocation can affect reach and connection points.
Splicing joins a fixture lead to the main lighting cable. Use a connector designed for the cable and outdoor conditions, then position the join to limit exposure to moisture and ground movement. The guide describes splice kits as providing moisture protection up to 600 volts; that rating does not replace correct product selection or installation.
To reduce energy use, schedule lights only when they serve a purpose and switch off unused zones. LED fixtures use less power than conventional lighting and can work with smart automation. Reduce light spill by aiming fixtures down or towards the feature, using only the brightness needed and avoiding lighting empty areas all night.
Smartphone apps for controlling outdoor lights
An app can switch compatible outdoor lights on or off, manage zones and activate saved scenes. Its control depends on the connection between the app and lighting system, so check that the equipment matches your existing lights and switching setup.
In Australia, outdoor electrical work must meet applicable safety requirements and product instructions. Mains-voltage connections are electrical work, not app setup, and must be handled by a licensed electrician. App control changes how you operate lights, but it does not remove electrical safety requirements.
To control outdoor lights from a phone, open the system’s app and select the relevant light or zone. If the system supports zones, you can control a garden path, deck and entry separately. Use the app to switch a zone manually, adjust available settings or activate a saved scene.
Remote control depends on the system’s connection. If the app communicates with the lighting control through a home network or another supported connection, you can operate the lights without standing beside the switch. Available functions depend on the control equipment, app and lighting circuit. Keep a physical switch accessible for straightforward manual operation.
App setup usually involves adding a compatible control, following its prompts and assigning it a clear name. Labels such as “front path” or “deck lights” make zones easier to identify. Test each control separately. If a tap activates the wrong fixtures, correct the zone name or control assignment before creating scenes.
Outdoor lighting can also connect with voice assistants, security systems and other smart-home systems when compatible. A voice command can activate a named zone, while an automation routine can coordinate lighting with another event. Use specific commands, such as “turn on the deck lights”, to avoid unintentionally switching on the entire outdoor circuit.
Scenes are useful for entertaining. One can adjust deck, garden and pool lighting together; another can leave only entry or pathway lights on. Build scenes around how you use each area, then select the appropriate one in the app instead of changing several controls individually.
If a command fails, check the selected zone, control connection and lighting circuit. If the switch works but the app does not, the issue may be with the app or connection. If the lights fail both ways, the problem may be in the lighting system. Keep app access secure and give shared users only the access they need.
Setting up smart landscape lighting
Start with the lighting system you have, not the app you hope to use. Map each fixture and switch, identify which lights share a circuit, and note the effect you want after dark. For example, keep entry lighting separate from garden uplighting so one control doesn’t illuminate every outdoor area.
Next, identify the system voltage. Low-voltage landscape lighting uses a transformer to supply 12 V to its fixtures. Mains-voltage lighting uses a different circuit and needs controls suited to that setup. The research guide says 120V line-voltage landscape lighting must be installed by a licensed electrician. Don’t treat connecting an app as a substitute for safe electrical work.
Choose controls that match the existing switching arrangement and the level of automation you need. A wireless switching module can operate compatible existing lights and switches without rewiring. Decide whether one control for the whole circuit is enough or whether you need separate zones for areas such as a driveway, deck and garden. The layout determines how useful separate controls will be.
Then set up the control in a clear sequence:
- Group the lights. Assign fixtures by purpose, such as paths, entertaining spaces or features that support home security.
- Match the control. Select a compatible control for the circuit and its existing switch arrangement.
- Name each zone. Use labels such as “entry path” or “rear garden” to make app or remote operation clear.
- Test each group. Switch every zone independently, then confirm the intended fixtures respond.
- Refine the effect. Adjust schedules or available settings so lights operate only when they serve a purpose.
After setup, test the system at the switch and through its intended control. If a whole circuit responds but one fixture does not, check that fixture and its connection. If no lights respond, check the control assignment and power path before changing the setup. Clear zone names make it easier to identify problems.
Keep the nighttime result in view as you organise the system. A direct beam on a path can aid visibility, while a separate garden zone can highlight planting without lighting the entire yard. Use schedules and occupancy sensing where supported, and avoid leaving unused areas illuminated. If you’re planning wireless switching, explore wireless lighting control options as part of your setup.
Gem Wireless: Switch Module Kits
Gem Wireless offers Switch Module Kits for adding wireless control to compatible existing lighting and switching systems. They can suit landscape lighting when you want to control existing lights without rewiring. Mains Powered Switches, Long Range Switches and Switching Modules offer further options for different switching setups.
Start by identifying which lights you want to control and how they are switched now. This helps you choose an approach suited to your setup, whether you want to manage an entry light or a separate garden zone. Gem Wireless provides wireless control solutions for residential and commercial settings.
For a practical next step, contact Gem Wireless to discuss its switching products, or visit gemwireless.com.au.
Make your next lighting change count
First decide what you want your outdoor lighting to do differently. Choose one practical goal, such as making an existing switch wireless or controlling a separate lighting circuit more easily. That gives you a clear starting point for planning how to control landscape lighting at home.
Gem Wireless offers Switch Module Kits, Mains Powered Switches and Long Range Switches for wireless lighting and switching control. These products can help modernise compatible existing systems without rewiring. Choose an approach based on your current switches and lights, and the areas you want to control.
If you’re ready to consider a wireless control option, contact Gem Wireless for lighting help. A considered change can make your outdoor spaces simpler to manage, while keeping the lighting focused on how you use them. Take the next step at your own pace and build a setup that works for your home.
Frequently Asked Questions
What are the main ways to control landscape lighting, including timers, photocells, and smart controls?
Common options include manual switches, timers, photocells, motion sensors and smart controls. A timer follows set operating times, while a photocell responds to daylight. Motion sensors activate lights when they detect movement. Depending on the system, smart controls can combine schedules with app or voice operation. To choose how to control landscape lighting, consider whether you need fixed routines, automatic responses or manual flexibility.
How do you set up a timer for outdoor landscape lights?
Set the timer’s clock, select the lighting circuit, then choose the days and on/off times. A fixed schedule suits a covered entry used each evening. If the timer offers sunset-based operation, use it when changing daylight makes a fixed start time inconvenient. Check the next activation and shut-off, then adjust the settings if the lights run outside the hours you need.
How do photocells control landscape lighting, and where should they be installed?
A photocell senses ambient light and switches connected lights on as it gets dark, then off as daylight returns. Place it where it can sense natural light clearly, away from direct illumination from the lights it controls. For example, a photocell beside a bright wall light may sense that light and switch the circuit off too early. Keep the sensing face clear of eaves, plants and other obstructions.
How do you zone landscape lights and control different areas independently?
Group fixtures by purpose, then assign each group to its own control zone. For example, keep driveway lights, an entertaining area and garden accents separate so switching one group doesn’t activate the others. Separate control depends on the system’s wiring and available control channels. Fixtures on the same circuit may operate together unless the setup allows them to be controlled separately. Label zones clearly in the app or at the switch.
landscape lightinglighting controlslighting scheduleslighting zonesmotion sensorsoutdoor lightingsmart lightingwireless modules