- Empty cart.
- Continue Shopping
How to Create a Three-Way Switch Wirelessly and Install It Safely
- Posted on
 Strong Digital
- 0
- Categories: Uncategorized
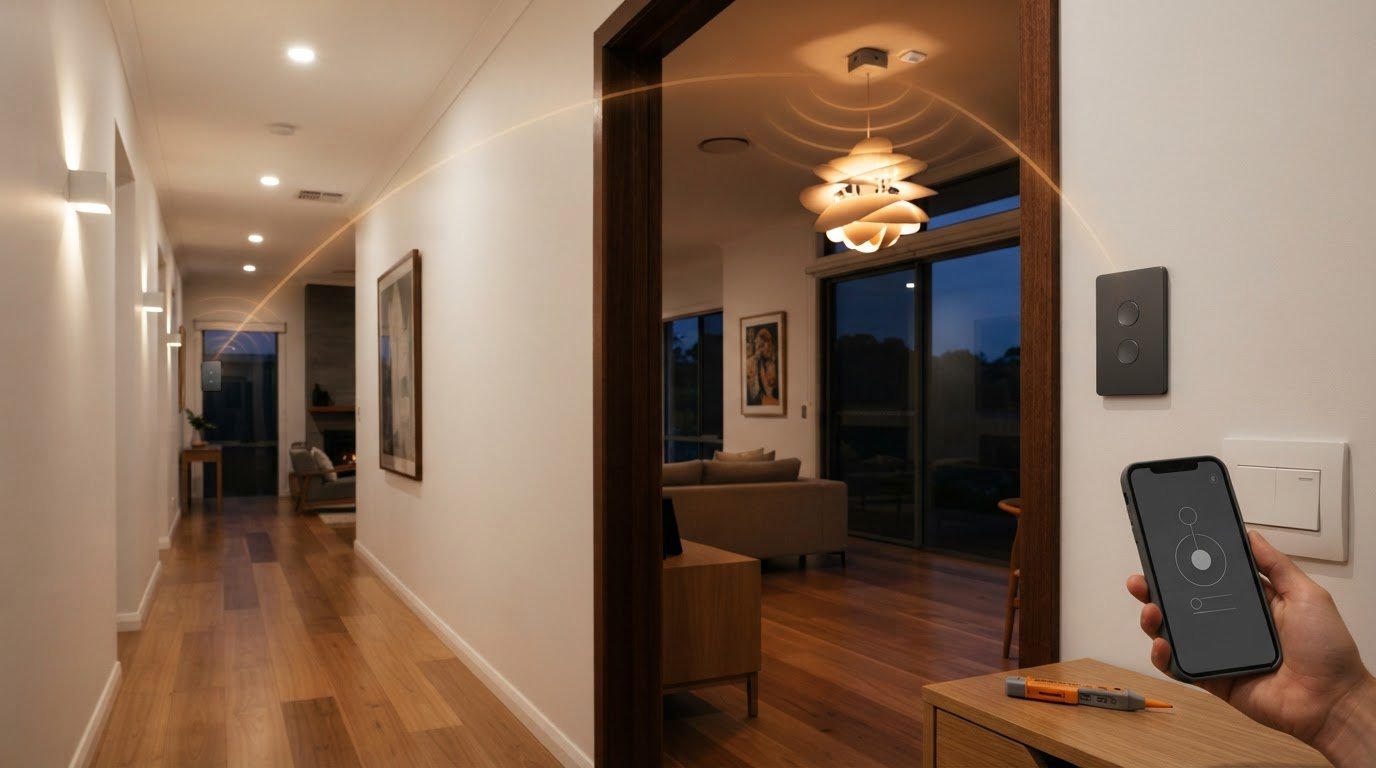
You can create a three-way switch wirelessly by adding a compatible wireless switch and switching module, allowing two controls to operate the same light without running new wires through walls. A traditional three-way lighting setup uses two switches to control one circuit. Wireless control offers a practical alternative when you need another switching point without rewiring.
Adding a switch may seem straightforward, but mains wiring requires care. Wireless control can simplify the layout, while safe installation still means treating any mains-powered components with caution.
This guide explains how to choose a wireless switch setup, position and pair its components, and follow essential safety steps. You’ll also learn what to consider when choosing a battery-free kit and when the work is better handled by a licensed electrician. By the end, you’ll have a clear path to controlling one light from multiple locations, without making the process more complicated than it needs to be.
Key Takeaways
- Mount the wireless switch where it’s easy to reach, then follow the kit’s pairing instructions to link it with the switching module.
- Choose a setup designed to let multiple wireless switches control the same light, and check compatibility with your existing switch and light.
- For battery-free control, compare how the kit powers its switch and how that suits your preferred mounting location.
- Before handling mains wiring, switch off power at the circuit breaker and use a voltage tester to confirm it’s off.
Mounting the wireless switch
For a direct switch-to-receiver link, RF can avoid dependence on home Wi-Fi. Wi-Fi relies on router coverage, while Zigbee and Z-Wave use compatible hubs or networks. Reliability depends on signal path, interference, device compatibility and power.
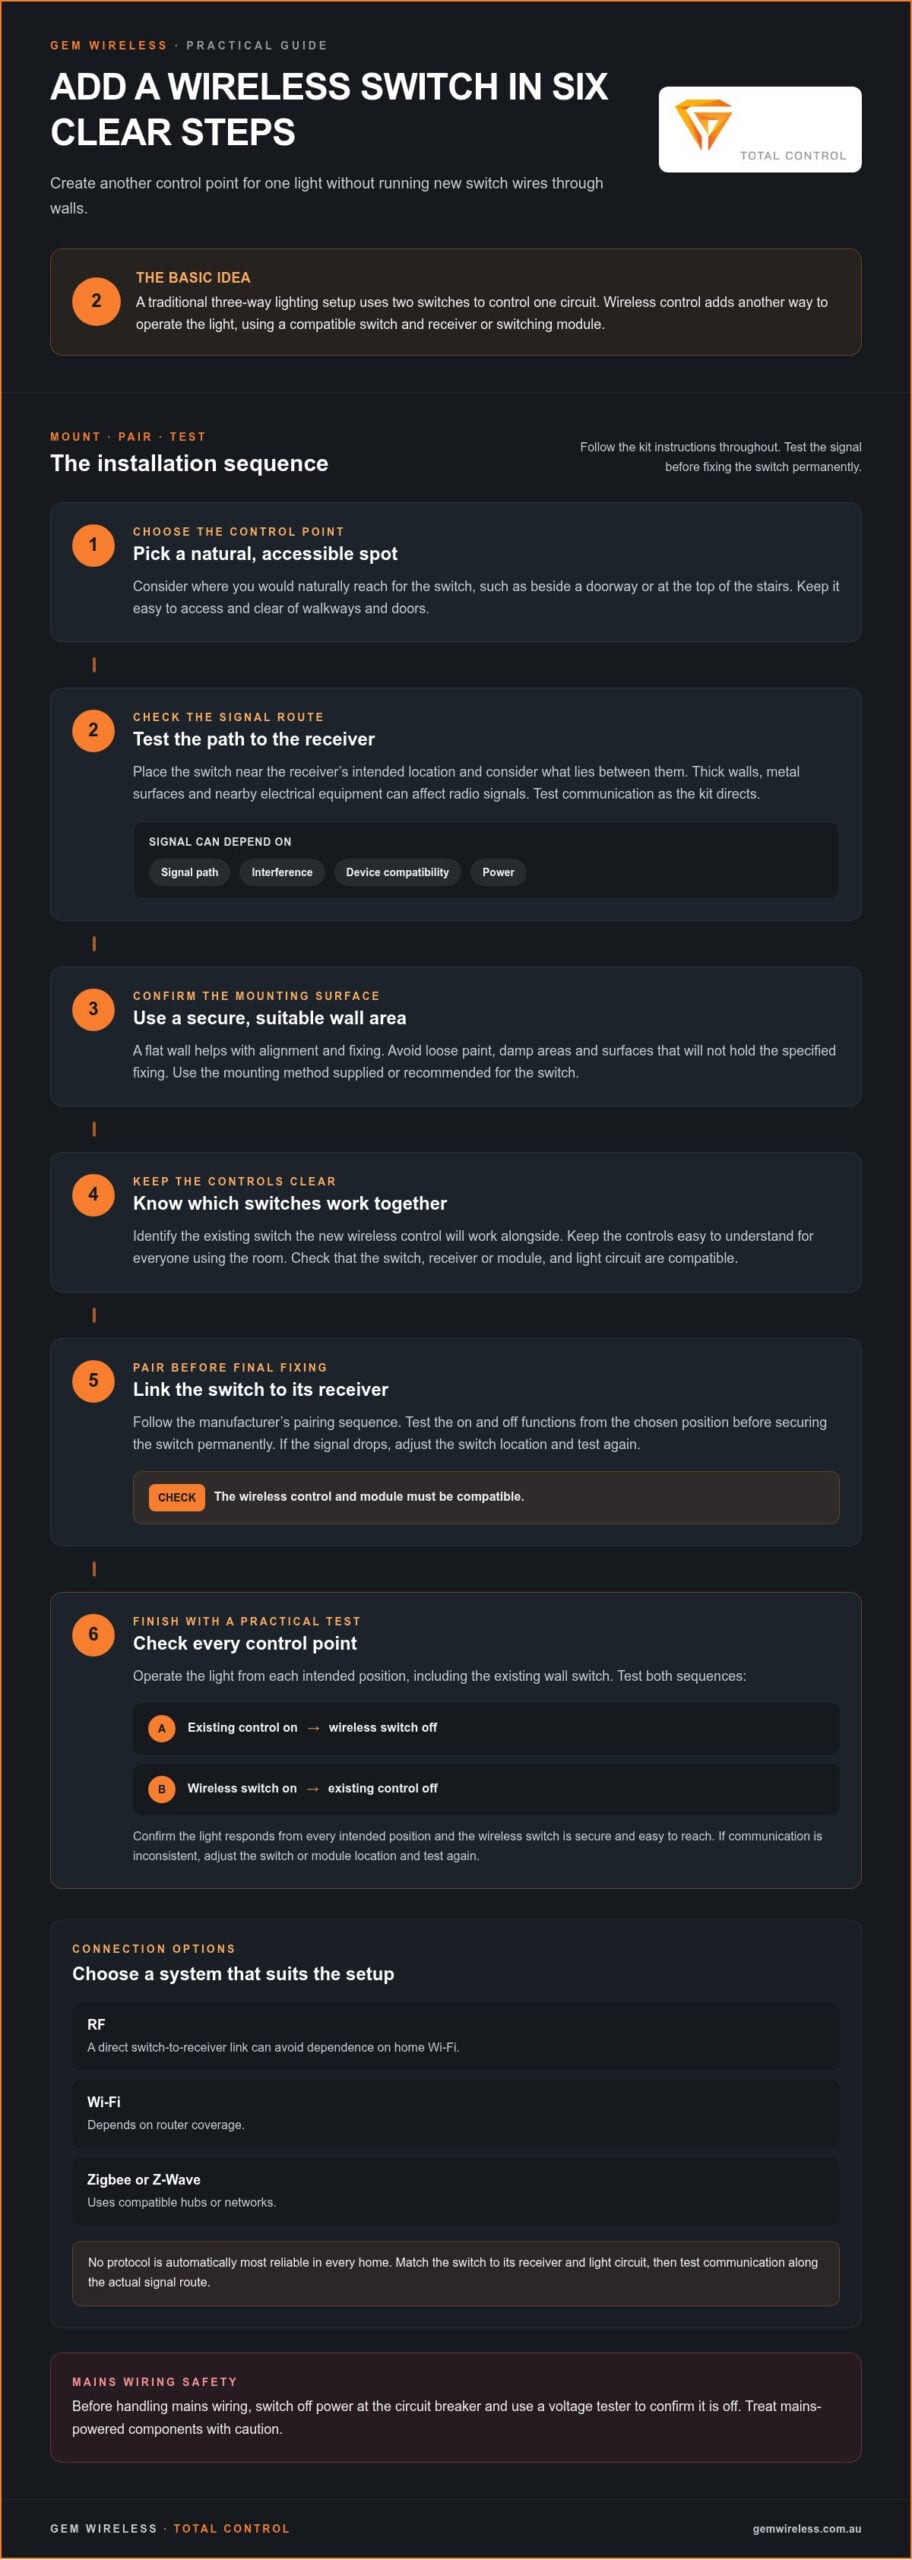
- Choose the control point. Stand where you’d naturally reach for the switch, such as beside a doorway or at the top of the stairs. Make sure the new location is easy to access and doesn’t obstruct a walkway or door.
- Check the signal route. Place the wireless switch near the receiver’s intended location, then consider obstacles between them. Thick walls, metal surfaces and electrical equipment can affect radio signals. Follow the kit’s instructions for testing communication before final fixing.
- Confirm the mounting surface. A flat wall makes it easier to align and secure a switch. Avoid loose paint, damp areas and surfaces that won’t hold the specified fixing. Use the mounting method supplied or recommended for the switch.
- Keep the existing switch arrangement clear. A traditional three-way lighting setup uses two switches to control the same circuit. If you’re adding wireless control, identify which existing switch the new control will work alongside, and keep the controls easy to understand for everyone using the room.
- Pair before finishing the mount. Follow the manufacturer’s sequence to pair the wireless switch with its receiver or module. Test the on and off functions from the chosen position. If the signal drops, adjust the switch location before securing it permanently.
- Finish with a practical check. Operate the light from each control point, including the existing wall switch. Confirm the wireless switch feels secure and remains easy to reach. For a system designed to avoid new wiring through walls, keep the wireless control and module compatible.
Wireless multi-location light control
Wireless control adds another way to operate a light without running switch wires between locations. Check compatibility and test each control point before relying on the setup.
-
Check range and compatibility limits
Check the manufacturer’s stated range and compatibility before positioning the transmitter and receiver. Wireless range depends on the signal path, walls, metal surfaces and nearby electrical equipment. Wi-Fi, Zigbee, Z-Wave and RF suit different setups, so no protocol is automatically most reliable in every home. Match the switch to its receiver and light circuit, then test communication across the actual route.
-
Add wireless control to an existing circuit
Identify the existing wired two-way circuit and the receiver’s intended connections before adding wireless control. A compatible receiver can add wireless operation to an existing circuit, while the wired switches may remain in use if the module supports them. Check the product instructions for the circuit and light requirements. Don’t assume every receiver will suit the existing wiring or load.
-
Set up multi-location light control
Pair each wireless control with the receiver that operates the light. A wireless three-way switch sends a signal to a receiver or switching module, which changes the light’s state. A practical way to create a three way switch wirelessly is to retain the existing wall control and add a compatible wireless transmitter at another entry. Follow the kit instructions so both controls operate the same light.
-
Test the lighting setup
Test each control separately, then use them in different sequences. Turn the light on at the existing control and off with the wireless switch, then reverse the order. Confirm the light responds from every intended position. If communication is inconsistent, adjust the switch or module location and test again, following the kit instructions.
Wireless, battery-free three-way switch kits
A wireless setup needs a control, a receiver or switching module, and a compatible light circuit. To create a three way switch wirelessly without routine battery changes, choose a battery-free switch designed to send its signal without a replaceable cell.
-
Identify the setup components
List the parts your lighting arrangement needs before selecting a kit. A basic setup includes a wireless switch, a receiver or module that operates the light, and a compatible existing circuit. The kit instructions explain how those parts connect and communicate. Check how the wireless control gets power, because battery-free models use a different method from battery-operated transmitters.
Match the receiver to both the light and the control function you need. For example, a standard on-off light needs a switching function, while dimming requires a compatible dimmer and dimmable light. If you want to retain an existing wall switch, make sure the module supports that arrangement. Don’t assume components from different kits will work together.
- Note whether the light needs on-off control or dimming.
- Compare the switch, module and light requirements in the kit instructions.
-
Choose a wireless switch kit
Choose a kit by its function, power method and compatibility, not just its appearance. To create a three way switch wirelessly, select a transmitter and receiver intended to operate the same light. A battery-free switch avoids replacing cells, but its power method and mounting options still need to suit the location and intended use.
Wireless dimmer kits provide brightness control only when both the receiver and light support dimming. A switched outlet kit serves a different purpose: it controls a compatible outlet load rather than a light circuit. Read the kit’s stated application before choosing, and don’t use an outlet kit as a substitute for a lighting module.
- Select dimming components only for a compatible dimmable light.
- Choose an outlet kit only when outlet control is the intended function.
- Follow the selected kit’s instructions for mounting and operation.
Electrical safety and installation steps
Wireless control can reduce the need for new switch wiring, but a receiver may still connect to mains electricity. Treat that part of the installation separately from mounting and pairing the wireless control.
- Read the installation instructions. Identify which steps involve mains wiring and which cover mounting the wireless control. Check the wiring diagram, receiver requirements and light compatibility before starting. Don’t rely on wire colours alone to identify a conductor.
- Turn off the circuit breaker. Switch off power to the lighting circuit before opening a switch or fitting a receiver. If the breaker doesn’t clearly identify the circuit, don’t assume the light switch has isolated the power.
- Confirm power is off. Use a voltage tester to check the relevant conductors before touching wiring. The installation instructions advise switching off power at the circuit breaker and using a voltage tester to confirm it’s off. Stop if the tester indicates voltage or you’re unsure how to test safely.
- Keep the wireless control separate from live wiring. Mount and pair the wireless switch according to its instructions. A battery-free or wireless switch doesn’t mean the receiver or existing light circuit is safe to handle while energised.
- Don’t guess at unfamiliar wiring. If the switch box contains unexpected conductors, damaged insulation or a layout that doesn’t match the diagram, leave it undisturbed. A licensed electrician can assess the mains wiring and complete work that requires electrical expertise.
- Secure covers before restoring power. Check that the receiver and switch components are fitted as instructed, with no exposed conductors or loose parts. Keep tools and hands clear of the fitting before restoring power at the breaker.
- Test the controls after installation. Operate the wired and wireless switches, then check that the light responds consistently. If you notice heat, a burning smell, unusual sounds or unreliable operation, switch off the circuit and arrange a safe assessment. For a compatible wireless control setup, explore wireless switching options.
Gem Wireless: Switch Module Kits
Gem Wireless offers Switch Module Kits for adding wireless control to compatible lighting and switching systems. The kits work with conventional switches and lights without rewiring, making them useful when you want another control point without running new switch wires through walls.
Choose components to suit the way you use the circuit. Mains Powered Switches provide mains-powered control, while Long Range Switches are designed for layouts where signal reach matters. Switching Modules connect wireless commands with switching operation. Check the product instructions to match the components to your existing switches and lights.
If you’re planning a wireless lighting setup, visit Gem Wireless to explore its switching options.
Plan your next lighting upgrade
To create a three-way switch wirelessly, start with how people move through the space. A hallway, stairwell or open-plan room may need different control positions, so consider how you use the room as well as where the light is. This helps you choose a setup that fits your lighting arrangement.
Gem Wireless offers Switch Module Kits, Mains Powered Switches and Long Range Switches for wireless lighting control. Consider which products suit your lighting arrangement and the distance between controls. Keep mains wiring separate from mounting the wireless control, and use a licensed electrician when the work requires electrical expertise.
Contact Gem Wireless for help exploring a suitable wireless switching option. A well-planned control setup can make everyday lighting simpler, one practical upgrade at a time.
Frequently Asked Questions
What wireless switch options are available in Australia for controlling one light from two locations?
A wireless transmitter and switching module provide another control point: the transmitter sends the command and the module operates the light. Gem Wireless Switch Module Kits include both components and work with conventional switch mechanisms. Choose a kit that matches the light’s switching requirements and the controls you want to use.
How do you install a wireless light switch and receiver safely?
Separate mounting the wireless control from any work on mains wiring. Mount the transmitter according to its instructions, and use the receiver’s wiring diagram to identify its intended connections. Before handling fixed wiring, isolate the relevant circuit and confirm it’s de-energised with a voltage tester. Don’t proceed if the wiring differs from the diagram or the receiver won’t fit securely in its intended location.
Do wireless switches require a neutral wire or batteries?
It depends on the switch and receiver design. A receiver connected to mains wiring may need a neutral, so use its wiring diagram rather than assuming. Wireless transmitters may use batteries or another power method. Gem Wireless product information lists Panasonic CR2032 coin cells for its switches, so those products aren’t battery-free. Check the specific product instructions before choosing a kit.
Do Australian electrical rules require a licensed electrician to install a wireless switch or receiver?
Requirements depend on the work involved and the rules applying in your state or territory. Mounting a wireless control is different from connecting a receiver to fixed mains wiring. Gem Wireless Switch Module Kits are plug-and-play, with no electrician, pairing or programming required for the wireless setup. That doesn’t establish permission to carry out other regulated electrical work, so treat mains wiring separately from mounting the control.
What are the safety risks of DIY wireless light switch installation in Australia?
The main risks arise from contact with live conductors or incorrect receiver connections. These can cause electric shock, a short circuit, equipment damage or overheating. Wireless control doesn’t remove hazards from the mains-powered part of a lighting system. Stop if wiring is damaged, unidentified or inconsistent with the diagram, and keep the circuit isolated while the issue is addressed.
DIY home improvementelectrical safetyhome lightingmulti-location lightingthree-way switcheswireless controlswireless light switches